Style sheets in WordPress
What is it all about?
If you want to change the look of the theme you are using for WordPress, or do some lavish graphics using animations, this is doable using a style sheet. You just have to be aware that not everything will work in WordPress, e.g. vertical text does not appear to work, and some parts you shouldn't be messing with.
Using STYLE in the HEAD tag
Normally, if you have a class or styling of a tag that you only use on one page, you would just create a STYLE in the HEAD of the page. This is not doable in WordPress! It is a matter of the entire WordPress structure, which is the use of a template for the design that all pages, using a specific theme, is using, and thus you can only write in what is the equivalent to the BODY tag. So, this is no-go.
Style sheets
WordPress comes with a ton of style sheets, placed in various folders in the files structure, if you look at the files on the server. Those you should keep you hands off. You can edit them, e.g. clicking "Appearance" and selecting "Theme Editor", but what happens is that on updates of the theme, your changes will be overwritten, and you have to start over with the editing. What you do instead is using "Additional CSS".
Additional CSS is found clicking "Customize" under "Appearance" on the dashboard. On the left side, you now have a navigation pane, for the theme Hemingway it looks like this:

When clicking Additional CSS at the bottom of the menu block, you access the page where you can do your changes:
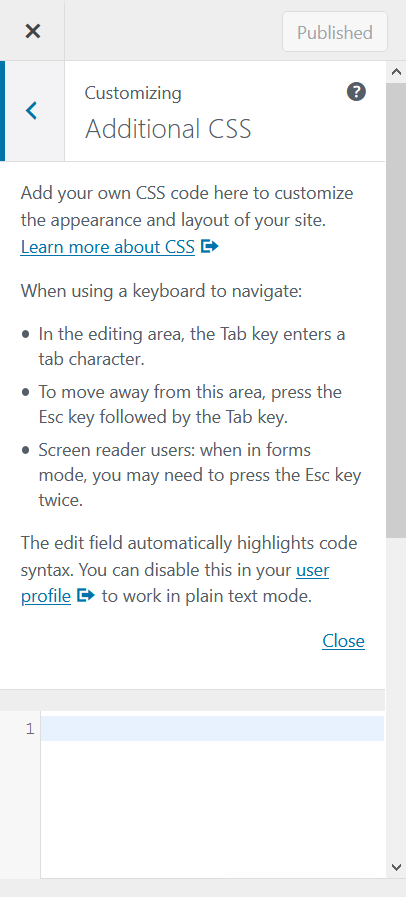
It isn't a particularly convenient panel to work with. If you click "Close" so the help text disappears, you a bit more workspace, but it is still a narrow panel, that, at least for the theme Hemingway, does not allow changes in size.
But now you can start creating classes and whatever else you may need. Here it is the H2 tag (the tag that is used for the title/headline on a post), changed to Times New Roman and given a gray shadow:
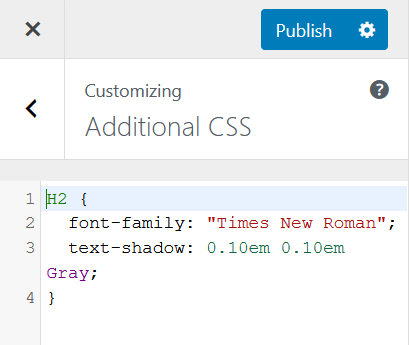
On the right side of the screen, the example page is updated as the changes are made, to the extent that there is something to be seen (the example page obviously can't show the effect of a class or tag not being used on the page).
When you are satisfied with your changes, you click "Publish", and the changes are shown on the website.
In regards to saving and publishing your changes to the style sheet, WordPress has several options, which is a bit clever. If you click on the gear icon next to "Publish", this will appear:
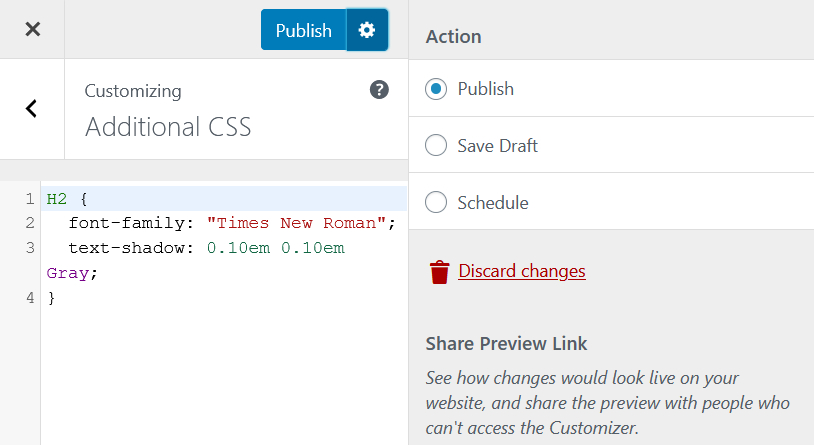
Now you can choose between publish, i.e. use the changes to the style sheetet now, save the changes as a draft, until you are ready to publish, or arrange (schedule) a planned implementation where you type date and time for when the website will start using the changed style sheet.
When you are done editing the style sheet, you click on the ✕ on the left side of "Publish" on the image.
Be aware that Additional CSS is limited to the theme! If you switch theme, you have to copy the changes to the new theme and make whatever adjustments that may be needed.
Additional CSS is found clicking "Customize" under "Appearance" on the dashboard. On the left side, you now have a navigation pane, for the theme Hemingway it looks like this:
When clicking Additional CSS at the bottom of the menu block, you access the page where you can do your changes:
It isn't a particularly convenient panel to work with. If you click "Close" so the help text disappears, you a bit more workspace, but it is still a narrow panel, that, at least for the theme Hemingway, does not allow changes in size.
But now you can start creating classes and whatever else you may need. Here it is the H2 tag (the tag that is used for the title/headline on a post), changed to Times New Roman and given a gray shadow:
On the right side of the screen, the example page is updated as the changes are made, to the extent that there is something to be seen (the example page obviously can't show the effect of a class or tag not being used on the page).
When you are satisfied with your changes, you click "Publish", and the changes are shown on the website.
In regards to saving and publishing your changes to the style sheet, WordPress has several options, which is a bit clever. If you click on the gear icon next to "Publish", this will appear:
Now you can choose between publish, i.e. use the changes to the style sheetet now, save the changes as a draft, until you are ready to publish, or arrange (schedule) a planned implementation where you type date and time for when the website will start using the changed style sheet.
When you are done editing the style sheet, you click on the ✕ on the left side of "Publish" on the image.
Be aware that Additional CSS is limited to the theme! If you switch theme, you have to copy the changes to the new theme and make whatever adjustments that may be needed.